Homemade Low-Calorie Training Treats for Weight Management

Struggling to find the perfect reward for your furry training companion without ruining their healthy diet? It’s time to get creative in the kitchen and whip up some homemade low-calorie treats! Training your pet is an essential part of helping them lead a healthy and happy life, but finding the right treats that won’t sabotage their weight management goals can be a challenge. Many store-bought options are often packed with calories and unhealthy additives. But fear not! With a few simple ingredients and a dash of love, you can create delicious and nutritious treats that your pet will adore.

These homemade goodies will not only satisfy their taste buds but also provide the encouragement they need to master those tricks and good behaviors. By using fresh, wholesome ingredients, you can ensure that every treat is packed with flavor and nutrition, making training sessions a delight for both you and your pet. Say goodbye to the worries of excess calories and hello to a happy, healthy training routine!

## Ingredients:
– 1/2 cup unsweetened applesauce
– 1/4 cup pumpkin puree
– 1/4 cup low-fat plain yogurt
– 1 tablespoon honey
– 1/2 cup whole wheat flour
– 1/4 cup old-fashioned oats
– A pinch of cinnamon (optional)

## Instructions:
1. Preheat your oven to 350°F (175°C) and line a baking sheet with parchment paper. This ensures a non-stick surface for your treats and makes cleanup a breeze!

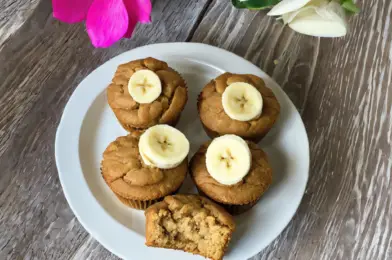
2. In a medium-sized bowl, combine the applesauce, pumpkin puree, yogurt, and honey. Mix until smooth and well incorporated. The applesauce and pumpkin provide natural sweetness and moisture, while the yogurt adds a creamy texture and a boost of protein.

3. Slowly stir in the flour and oats. The whole wheat flour provides fiber and a hearty texture, while the oats offer additional nutrients and crunch. If you want to add a bit of aromatic spice, a pinch of cinnamon can be mixed in at this step.

4. The batter should be thick and slightly sticky. Using a spoon or a piping bag, drop small portions onto the prepared baking sheet, leaving some space between each treat for even baking.

5. Pop the baking sheet into the oven and let the treats bake for approximately 15-20 minutes. Keep an eye on them to ensure they don’t overcook. You’re aiming for a golden brown color and a firm texture.

6. Once done, remove the treats from the oven and let them cool completely. Enjoy the delightful aroma of freshly baked treats filling your kitchen!

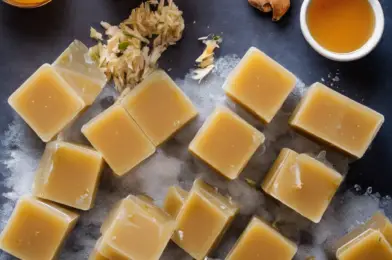
7. Store your treats in an airtight container in the refrigerator for up to a week, or freeze them for longer-term storage. This ensures they stay fresh and ready for your training sessions whenever the need arises.

These homemade low-calorie training treats are a perfect way to bond with your pet while supporting their healthy diet. Not only will they love the taste, but you’ll also love the peace of mind knowing exactly what goes into their snacks. So, get ready for some tail-wagging, purr-fect training sessions with these delicious treats by your side!

With this simple recipe, you can make training sessions more enjoyable and guilt-free. Remember, moderation is key, and these treats should be part of a balanced diet and exercise plan for your pet. Happy baking, and happy training!

Zucchini and Carrot ‘Donut’ Dog Treats

If you’re looking for a fun and nutritious way to treat your furry friend, why not try whipping up some zucchini and carrot ‘donut’ dog treats? These delicious goodies are not only adorable but also packed with healthy ingredients that your dog will love. Made with simple and natural ingredients, these treats are a wholesome alternative to store-bought options and provide a great way to show your pup some extra love. And let’s be honest, who doesn’t enjoy spoiling their four-legged companion?

Introducing vegetables into your dog’s diet can be a great way to add variety and essential nutrients. Zucchini and carrots are not only tasty but also offer numerous health benefits. Zucchini provides a good source of vitamins and fiber, while carrots are loaded with beta-carotene, which is excellent for your dog’s skin and eye health. These treats are a fantastic way to incorporate these veggies into your dog’s diet, especially if they are picky eaters!

To make these ‘donut’ treats, you’ll need just a few ingredients. Start by preheating your oven to 350°F. Then, in a large bowl, combine grated zucchini and carrots, whole wheat flour, an egg, peanut butter, and a pinch of cinnamon. Mix until a sticky dough forms. The peanut butter adds a tasty dimension to the treats, but it’s important to use a natural, unsalted variety to avoid any unnecessary additives. You can also substitute it with another dog-safe nut butter, like almond or sunflower seed butter, if your dog has any allergies or sensitivities.

Next, roll the dough out on a floured surface and use a donut-shaped cookie cutter to create the adorable donut shapes. If you don’t have a donut cutter, get creative and use different cookie cutters to make fun designs or simply roll the dough into small balls and flatten them. Place the treats onto a baking sheet lined with parchment paper and bake for approximately 20 minutes, or until they are firm and slightly golden. The baking time may vary depending on the size of your treats, so keep an eye on them to ensure they don’t overcook.

These homemade goodies provide a great opportunity for quality time in the kitchen with your furry friend. Involving your dog in the process can make it even more enjoyable. They’ll love being your little helper, and you’ll love seeing the joy on their face when they get to try the finished product! It’s a win-win situation! Once the treats are cooled, store them in an airtight container in the fridge to keep them fresh for up to a week.

These zucchini and carrot ‘donut’ dog treats are not only a healthy and delicious snack for your pup but also a fun baking project. They are perfect for everyday treats or even special occasions. Whether you’re celebrating a birthday, ‘gotcha day,’ or just want to show your love, these treats will surely be a hit with your four-legged friend. So, go ahead and give them a try! Your dog will thank you with plenty of tail wags and happy licks.

Peanut Butter and Banana ‘Pupcakes’

Are you ready to treat your pup to some homemade deliciousness? These Peanut Butter and Banana ‘Pupcakes’ are the perfect culinary adventure for dog owners who want to spoil their furry friends with a tasty and healthy treat. Your canine companion is sure to go bananas over these mouth-watering goodies! This recipe is not only a fun activity for dog lovers but also a healthy alternative to store-bought treats. So, let’s get baking and treat your furry friend to some gourmet delights!

Ingredients:
– 1 cup of whole wheat flour (you can use all-purpose flour if you prefer, but whole wheat adds extra fiber)
– 1 teaspoon of baking powder
– 1/4 cup of natural peanut butter (smooth or crunchy, depending on your dog’s preference)
– 1 ripe banana, mashed
– 1/4 cup of unsweetened applesauce
– 1/2 cup of milk (dairy or non-dairy, whichever your dog can tolerate)
– 1 egg
– A dash of cinnamon (optional, but it adds a nice aroma)

Instructions:
1. Preheat your oven to 350°F (180°C). Line a cupcake pan with paper liners or lightly grease the pan. This recipe typically yields around 12 pupcakes, so prepare your pan accordingly.

2. In a large mixing bowl, combine the flour and baking powder. Ensure there are no lumps, as this will affect the texture of your pupcakes.

3. In a separate bowl, mix the peanut butter, mashed banana, applesau0ce, milk, and egg until smooth. The mixture should be relatively lump-free.

4. Add the dry ingredients to the wet ingredients and stir until just combined. Avoid over-mixing, as it can make your pupcakes tough. A few small lumps are okay!

5. Fill each cupcake liner about three-quarters full. You can also use a mini cupcake pan for bite-sized treats, but adjust the baking time accordingly.

6. Bake for 15-18 minutes, or until a toothpick inserted into the center comes out clean. Keep an eye on them to ensure they don’t overcook!

7. Allow the pupcakes to cool completely before serving. You can even freeze them for later if you want to make a bigger batch.

These pupcakes are not only delicious but also packed with nutrients. Peanut butter is an excellent source of protein and healthy fats, while bananas provide potassium and fiber. The absence of added sugar and the use of natural ingredients make these treats a healthy option for your pup.

Treat time is a special moment for every dog, and these homemade goodies will surely become a favorite. So, put on your apron, gather the ingredients, and get baking! Your furry friend will thank you with lots of tail wags and happy barks. Enjoy the baking process and the joy of treating your beloved pet to something special.

Frozen Bone Broth Cubes: A Nutrient-Rich Treat

Frozen bone broth cubes are a convenient and delicious way to boost your nutrient intake and add a healthy twist to your cooking. These little cubes pack a serious nutritional punch and are an easy way to incorporate the benefits of bone broth into your daily routine. By freezing bone broth, you unlock a versatile and tasty addition to your culinary creations.

Bone broth has long been revered for its numerous health benefits and is touted by many as a superfood. It is rich in essential nutrients that support overall well-being, including vitamins, minerals, amino acids, and collagen. Traditionally, bone broth has been used to bolster the immune system, improve joint health, and promote gut integrity. The process of simmering animal bones, cartilage, and connective tissues extracts these nutrients, creating a flavorful and nourishing liquid.

The beauty of frozen bone broth cubes lies in their convenience. After preparing a batch of bone broth, simply pour the liquid into ice cube trays and freeze. This method allows for easy portion control and quick defrosting. Add a cube or two to your favorite recipes, such as stews, soups, or sauces, to infuse them with extra flavor and nutrition. The frozen cubes can also be popped into a mug of hot water for a comforting and restorative drink.

Incorporating bone broth cubes into your diet is a simple way to enhance the nutritional value of your meals. For busy individuals, they offer a convenient solution to ensure you’re getting those much-needed nutrients. Just keep a tray of frozen cubes on hand and add them to whatever you’re cooking. They’re an effortless way to elevate your culinary creations and support a healthy lifestyle.

These nutrient-dense cubes are a must-have in your freezer, especially if you’re health-conscious and value the benefits of bone broth. You can make large batches of bone broth and freeze them, ensuring you always have a supply of these powerful cubes ready to go. No more worrying about wasting leftover broth!

In terms of flavor, bone broth adds a savory depth to your dishes. The slow-cooked essence of bones and vegetables creates a rich, aromatic profile that enhances the taste of any dish. Even a small cube can significantly improve the flavor of soups, gravies, and sauces.

From a health perspective, the benefits are equally impressive. Bone broth is celebrated for its potential to support digestive health due to its gelatin content, which is known to soothe and heal the gut lining. It also aids in joint health by providing collagen and amino acids to support cartilage and bone structure. The high mineral content in bone broth supports immune function and overall bone health.

In conclusion, frozen bone broth cubes are a convenient, healthy, and versatile addition to any kitchen. They offer a unique way to integrate the benefits of bone broth into your daily meals, all while adding a burst of flavor. By freezing your broth, you’ll always have a nutrient-rich ingredient at your fingertips, ready to transform your culinary creations into something truly special. So, give it a try and see the difference these cubes can make!

Hypoallergenic Fish and Sweet Potato Treats

Are you tired of constantly monitoring your pet’s diet, worrying about triggering their allergies? Say goodbye to that stress with the latest innovation in pet treats: hypoallergenic fish and sweet potato snacks! These treats are not just delicious but also carefully crafted to ensure a happy and healthy tummy for your furry friend.

Many pet parents struggle with finding the perfect snack that caters to their pet’s dietary restrictions. The market is flooded with options, but not all treats are created equal. Some may contain ingredients that could potentially trigger allergic reactions, making your pet’s life uncomfortable and causing you worry and distress. However, with hypoallergenic fish and sweet potato treats, you can finally breathe easy.

What sets these treats apart is their thoughtfully selected ingredients. Fish, known for its rich omega-3 fatty acids, provides a natural and hypoallergenic protein source that supports your pet’s skin and coat health. Paired with sweet potatoes, which are rich in vitamins and minerals, these treats offer a balanced and nourishing snack. Sweet potatoes are easily digestible and have a lower risk of triggering allergies, making them a perfect choice for sensitive tummies.

The preparation process is just as important as the ingredients. These treats are carefully crafted to maintain the nutritional integrity of the ingredients. The fish is sourced from sustainable fisheries and gently cooked to retain its nutritional value. The sweet potatoes are selected at their peak ripeness and prepared without any additives or preservatives, ensuring a pure and healthy snack.

Each treat is prepared in small batches to guarantee quality and freshness. This attention to detail ensures that your pet receives a delicious and nutritious snack every time. Many pets have experienced the benefits of this thoughtful preparation, enjoying treats without any adverse reactions.

But these treats are not just about the health benefits; they’re also about taste! Pets love the unique combination of flavors, making treat time a highly anticipated part of their day. You’ll witness their excitement as they eagerly await their daily dose of these delicious treats.

The hypoallergenic nature of these snacks also means peace of mind for pet parents. No more post-snack itching or discomfort for your furry friend. Say goodbye to the trial-and-error process of finding the right treat, as these are carefully formulated to minimize allergic reactions.

These treats cater to dogs and cats, ensuring that various furry family members can enjoy them. And with different packaging options, you can choose the perfect amount for your pet’s needs, ensuring freshness with every treat.

In a world where pet allergies are becoming more common, hypoallergenic fish and sweet potato treats stand out as a reliable and nutritious option. They offer a safe and tasty solution for your pet’s snack time, making them a favorite among pet parents and their beloved companions.

So, why settle for ordinary treats that might cause allergies when you can provide your pet with a delicious and healthy alternative? Try hypoallergenic fish and sweet potato treats today and experience the joy of worry-free snacking for your furry friend! Your pet’s happiness and health are worth it!

Cheesy Bacon Dog Treats: A Special Occasion Snack

Is your furry friend a bacon-loving pooch with a penchant for cheese? If so, get ready to spoil them with some homemade Cheesy Bacon Dog Treats that are sure for a special occasion! These delectable treats are a perfect way to celebrate your canine’s birthday, adoption day, or any other milestone. Not only will your dog be thrilled, but you’ll also have a blast whipping up these tasty snacks in the kitchen!

The star ingredients, cheese and bacon, are a dynamic duo that promises to tantalize your dog’s taste buds. Cheesy Bacon Dog Treats are not just delicious but also provide a fun cooking experience for the whole family. So, gather the kids and get ready for some quality time in the kitchen! As you prepare these treats, you’ll create cherished memories while teaching your little ones about the joy of cooking for their furry sibling.

Now, let’s dive into the simple process of making these mouth-watering rewards. First, you’ll need to gather your ingredients: grated cheese, bacon, and a few other basic items. Preheat your oven, and line a baking sheet with parchment paper, ensuring it’s ready to receive the soon-to-be doggy delights. In a large bowl, combine the cheese and crumbled bacon, then add the remaining ingredients and mix until a dough forms.

The fun part begins as you roll the dough into small balls, each one destined to become a taste explosion for your pup. Place these balls on the prepared baking sheet, leaving some space between them for even cooking. Pop the tray into the oven and watch as the treats bake to perfection. The heavenly aroma of cheese and bacon will fill your kitchen, leaving your dog eagerly anticipating the deliciousness to come.

As the treats cool, you can almost hear the excitement in your dog’s panting. Once they are ready, let them cool completely, then store them in an airtight container. The anticipation will build as your four-legged friend waits for the big reveal. When the special occasion arrives, offer your dog a Cheesy Bacon treat and watch their eyes light up with pure joy. Who knew such a simple snack could bring so much happiness!

It’s essential to remember that these treats are special indulgences and should be given in moderation. While they are a delightful way to celebrate, they should not replace a balanced diet. As with all good things, too much can be harmful, so be mindful of your dog’s overall diet and treat consumption.

These homemade treats are not only a fun cooking project, but they also offer a healthier, more personalized alternative to store-bought options. You can control the ingredients, ensuring your dog gets the best possible snack. So, get creative and customize the recipe to suit your pup’s tastes or any dietary restrictions they may have.

Imagine the joy on your dog’s face as they savor each bite of these homemade goodies, and cherish the knowledge that you crafted these treats with love. Cheesy Bacon Dog Treats are a simple, fun way to bond with your furry friend and show them just how much you care.

Now that you have this delicious recipe in your arsenal, get ready to make every special occasion a memorable one for your canine companion!

Blueberry and Spinach Superfood Dog Treats

## Homemade Blueberry and Spinach Dog Treats: A Healthy Snack for Your Canine Companion

As a dog owner, you want nothing but the best for your furry friend, and that includes providing them with healthy and delicious treats. Introducing a special recipe for homemade dog treats – Blueberry and Spinach Superfood Bites! These treats are packed with nutrition and flavor, offering a fun and wholesome snack option for your dog. Say goodbye to store-bought treats filled with artificial ingredients and hello to fresh, homemade goodness.

Blueberries and spinach are not only tasty but also nutrient-rich, making them excellent additions to your dog’s diet. Blueberries are known for their high levels of antioxidants, vitamins, and fiber, which can contribute to a healthy immune system and digestion. Spinach, with its vitamins A and K, iron, and antioxidants, provides a boost to your dog’s overall health. These superfoods combined create a powerful and nutritious treat that your dog will love.

**Ingredients:**
– 2 cups of fresh or frozen blueberries
– 1 cup of fresh spinach
– 2 tablespoons of coconut oil
– 2 cups of whole wheat flour
– 1/2 cup of quick-cooking oats
– 1/4 cup of water

**Instructions:**
1. Preheat your oven to 350°F (180°C). Line a baking sheet with parchment paper.
2. Puree the blueberries and spinach in a blender or food processor until smooth.
3h. In a large bowl, mix the blueberry-spinach puree, coconut oil, flour, oats, and water until well combined. The dough should be firm but slightly sticky.
4. Roll out the dough on a floured surface to about 1/4 inch thickness. Cut out shapes using a cookie cutter of your choice or simply cut into small squares.
5. Place the treats on the prepared baking sheet and bake for approximately 20-25 minutes until firm.
6. Allow the treats to cool completely before serving them to your pup!

These homemade treats are a fun and healthy way to show your dog some love. The recipe is simple to follow, and your dog will appreciate the fresh, tasty treats. Customizing the treats with your dog’s favorite cookie cutter shapes can make them even more special.

Making your own dog treats ensures you know exactly what your dog is eating, and the ingredients are all-natural and safe. Say goodbye to worrying about unknown additives and hello to peace of mind! This recipe is a great way to bond with your furry friend while providing them with a healthy snack.

If you’re looking for more homemade dog treat ideas, there are plenty of options to explore. From peanut butter bites to sweet potato chews, the possibilities are endless. Creating your own treats allows you to cater to your dog’s taste preferences and dietary needs. So, get creative and have fun in the kitchen with your four-legged friend!

Remember, treats should be given in moderation as part of a balanced diet, but these Blueberry and Spinach Superfood Bites are a wonderful, healthy option to include in your dog’s treat rotation. Your dog will be wagging their tail with delight!

So, why not give it a try? Your dog will love these homemade treats, and you’ll love knowing you’re providing them with the best. Happy baking, and happy tails!

Homemade Jerky: Dehydrated Meat Treats for Dogs

Most dogs love meat, and jerky is a delightful treat that can provide a tasty reward for your furry friend. But did you know that making your own jerky at home is not only cost-effective but also ensures your dog gets a healthier snack? Commercially produced dog treats often contain additives and preservatives, but homemade jerky allows you to control the ingredients, making it a safer and more nourishing option. Plus, preparing treats for your pet can be a fun and rewarding experience.

The key to successful jerky is dehydration. This process removes moisture from the meat, making it chewy and safely preserved. Dehydration is a simple technique that, with the right equipment, can be done in the comfort of your own kitchen. Investing in a food dehydrator is a great idea if you plan to make jerky regularly. These appliances are designed to maintain a low, even temperature for optimal drying. Alternatively, you can use your oven set at a low temperature for a longer period.
|
When selecting meat for jerky, opt for lean cuts. Excess fat will cause the jerky to spoil faster. Beef, chicken breast, or turkey breast are excellent choices, and you can even use fish like salmon, ensuring you remove all bones. Trim off any visible fat, then slice the meat into thin, even strips. The thinner the slices, the faster the meat will dehydrate.

Before dehydration, you’ll want to marinate the meat. Marinades add flavor and help preserve the jerky. A simple mixture of vegetable oil, vinegar, and water will work, but you can also use apple cider vinegar or even Worcestershire sauce. Add spices like garlic powder, onion powder, or paprika for a flavor boost. However, avoid salt, as it can be harmful to dogs in large quantities. Let the meat soak in the marinade for several hours or overnight for the best flavor.

Now, it’s time to dehydrate. In a dehydrator, lay the meat strips in a single layer on the racks, ensuring they don’t overlap. Depending on the thickness of your slices and the type of meat, drying can take anywhere from 4 to 6 hours. In an oven, place the slices on a wire rack over a baking sheet to allow air circulation, and set the temperature between 170°F to 180°F. Again, drying time will vary, but expect this process to take about 4-8 hours. Your jerky will be ready when it’s chewy and tough but not brittle.

Once your jerky is done, it’s essential to store it properly to maintain freshness. Allow it to cool completely, then place it in an airtight container or resealable bags. Store it in a cool, dark place or the refrigerator for up to 2 weeks, or freeze it for up to 3 months.

Treating your dog with homemade jerky is a wonderful way to show your love. Just remember, like all treats, jerky should be given in moderation as part of a balanced diet. It’s always a good idea to consult with your veterinarian if you have any concerns or questions about your dog’s diet. And if you’re feeling creative, you can experiment with different meats and marinades to find your dog’s favorite flavor combinations!

So, roll up your sleeves and give homemade jerky a try. Your dog will thank you with tail wags and happy licks!

Veggie-Packed Savory Dog Biscuits

Your dog deserves a healthy and delicious treat, and what could be better than homemade veggie-packed savory dog biscuits? These biscuits are not only tasty but also packed with wholesome goodness, making them the perfect snack for your furry friend. Say goodbye to store-bought treats filled with questionable ingredients and hello to a fun, easy-to-make alternative that will have your pup wagging their tail with delight!

Ingredients are key when it comes to these savory delights. Freshly chopped carrots, sweet potatoes, and green beans are the stars of the show, adding a nutritional punch while keeping the flavor profile appealing to your canine companion. These veggies are not only rich in vitamins and fiber but also provide a satisfying crunch that dogs love. By incorporating these ingredients, you’re ensuring your pet gets a well-balanced treat that contributes to their overall health and happiness. Each bite is like a little burst of garden freshness!

The recipe is simple, making it an ideal project for new bakers or those looking for a quick treat to whip up. It starts with blending the vegetables to a fine consistency and then combining them with whole wheat flour, oats, and a touch of peanut butter for that extra nutty flavor. Don’t worry; the process is mess-free, and the ingredients come together beautifully with minimal effort. After shaping the dough into bone-shaped biscuits, you’ll pop them in the oven, and in no time, your home will be filled with a mouth-watering aroma that will have your dog’s attention in an instant.

These homemade biscuits are not just about the deliciousness; they’re also about ensuring your dog’s treats are free from artificial ingredients. Many store-bought options are loaded with preservatives and additives, which can be a cause for concern for health-conscious pet owners. By baking your own, you’re in control, ensuring that each ingredient is healthy, fresh, and beneficial to your pet’s diet. It’s a win-win situation—a tasty treat without the worry.

In addition to being a healthier option, these veggie-packed biscuits offer a fun way to introduce more vegetables into your dog’s diet. If you’ve been struggling to get your pet to eat their greens, this recipe could be the secret weapon you’ve been searching for. The biscuits’ savory taste and texture will have your dog eagerly awaiting their next snack, and you’ll love the peace of mind that comes with knowing you’re providing them with the best.

The benefits of these homemade dog treats extend beyond just the ingredients. Baking them is a great bonding activity for the whole family. Kids can get involved, learning about the importance of healthy eating for pets while having fun in the kitchen. It also fosters a sense of responsibility and creativity as they help craft a special treat for their furry sibling.

So, roll up your sleeves and get ready to bake! These veggie-packed savory dog biscuits are not only a recipe for healthier, happier pets but also an opportunity to create lasting memories in the kitchen. Your dog will thank you with every enthusiastic crunch, and you’ll feel the joy that comes from providing them with a treat that’s truly made with love.

No-Bake Coconut and Honey Dog Balls

Making your furry friend some homemade treats can be a fun and healthy way to show your love, and these No-Bake Coconut and Honey Dog Balls are the perfect recipe to try! Easy to prepare and packed with wholesome ingredients, these tasty treats will have your dog wagging their tail with delight.

This no-bake recipe is quick and straightforward, making it ideal for those busy pet parents who still want to provide their pups with delicious, homemade goodies. All you need are a few simple ingredients that you might already have in your pantry! The main stars are coconut and honey, both known for their sweet and nourishing qualities. Coconut provides healthy fats, while honey adds a natural sweetness that dogs love, and it’s a great alternative to processed sugars.
>Ingredients:
– 2 cups of shredded coconut, either sweetened or unsweetened based on your preference.
– 3/4 cup of creamy peanut butter, a tasty protein-packed addition. (Ensure it’s xylitol-free as xylitol is toxic to dogs.)
– 1/4 cup of honey, a natural sweetener with added health benefits.
– 1/2 cup of milk, cow’s or plant-based, to help bind the mixture.
– 1/2 cup of whole oats, for added fiber and texture.

Preparation:
1. In a medium-sized bowl, mix the shredded coconut, peanut butter, and honey until well combined. You can use a spoon, but mixing with your hands gets a little messy and is a whole lot of fun!
2. Slowly add the milk, stirring continuously until you have a sticky mixture that holds together well.
3. Take a small amount of the mixture and roll it into balls, approximately 1-inch in diameter. A great task for little helpers if you have any around!
4. Roll each ball in the oats to coat them. This gives the treats a lovely texture and appearance.

These treats don’t require any baking, making them super convenient. Place the balls on a tray or plate and refrigerate for at least 2 hours to firm up. Once ready, pop them into an airtight container and store them in the fridge to maintain their freshness for up to 2 weeks.

What’s more, these treats aren’t just delicious, but they’re also a healthier alternative to many store-bought options. Coconut and honey are known to have antibacterial and immune-boosting properties, so you can feel good about giving them to your furry friend as a special reward.

Your dog will adore these No-Bake Coconut and Honey Dog Balls, and they’re so simple to make that you’ll be reaching for this recipe time and time again. They’re perfect for a quick reward during training sessions or as a special everyday treat. Enjoy the process, and watch your dog’s excitement as they anticipate these yummy snacks!

There you have it! An easy, no-bake treat that’s sure to become a favorite in your household. Happy treating!