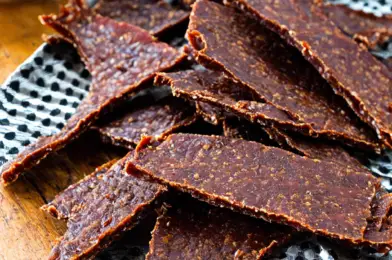
Homemade Jerky: Dehydrated Meat Treats for Dogs

Most dogs love meat, and jerky is a delightful treat that can provide a tasty reward for your furry friend. But did you know that making your own jerky at home is not only cost-effective but also ensures your dog gets a healthier snack? Commercially produced dog treats often contain additives and preservatives, but homemade jerky allows you to control the ingredients, making it a safer and more nourishing option. Plus, preparing treats for your pet can be a fun and rewarding experience.

The key to successful jerky is dehydration. This process removes moisture from the meat, making it chewy and safely preserved. Dehydration is a simple technique that, with the right equipment, can be done in the comfort of your own kitchen. Investing in a food dehydrator is a great idea if you plan to make jerky regularly. These appliances are designed to maintain a low, even temperature for optimal drying. Alternatively, you can use your oven set at a low temperature for a longer period.
|
When selecting meat for jerky, opt for lean cuts. Excess fat will cause the jerky to spoil faster. Beef, chicken breast, or turkey breast are excellent choices, and you can even use fish like salmon, ensuring you remove all bones. Trim off any visible fat, then slice the meat into thin, even strips. The thinner the slices, the faster the meat will dehydrate.

Before dehydration, you’ll want to marinate the meat. Marinades add flavor and help preserve the jerky. A simple mixture of vegetable oil, vinegar, and water will work, but you can also use apple cider vinegar or even Worcestershire sauce. Add spices like garlic powder, onion powder, or paprika for a flavor boost. However, avoid salt, as it can be harmful to dogs in large quantities. Let the meat soak in the marinade for several hours or overnight for the best flavor.

Now, it’s time to dehydrate. In a dehydrator, lay the meat strips in a single layer on the racks, ensuring they don’t overlap. Depending on the thickness of your slices and the type of meat, drying can take anywhere from 4 to 6 hours. In an oven, place the slices on a wire rack over a baking sheet to allow air circulation, and set the temperature between 170°F to 180°F. Again, drying time will vary, but expect this process to take about 4-8 hours. Your jerky will be ready when it’s chewy and tough but not brittle.

Once your jerky is done, it’s essential to store it properly to maintain freshness. Allow it to cool completely, then place it in an airtight container or resealable bags. Store it in a cool, dark place or the refrigerator for up to 2 weeks, or freeze it for up to 3 months.

Treating your dog with homemade jerky is a wonderful way to show your love. Just remember, like all treats, jerky should be given in moderation as part of a balanced diet. It’s always a good idea to consult with your veterinarian if you have any concerns or questions about your dog’s diet. And if you’re feeling creative, you can experiment with different meats and marinades to find your dog’s favorite flavor combinations!

So, roll up your sleeves and give homemade jerky a try. Your dog will thank you with tail wags and happy licks!

Veggie-Packed Savory Dog Biscuits

Your dog deserves a healthy and delicious treat, and what could be better than homemade veggie-packed savory dog biscuits? These biscuits are not only tasty but also packed with wholesome goodness, making them the perfect snack for your furry friend. Say goodbye to store-bought treats filled with questionable ingredients and hello to a fun, easy-to-make alternative that will have your pup wagging their tail with delight!

Ingredients are key when it comes to these savory delights. Freshly chopped carrots, sweet potatoes, and green beans are the stars of the show, adding a nutritional punch while keeping the flavor profile appealing to your canine companion. These veggies are not only rich in vitamins and fiber but also provide a satisfying crunch that dogs love. By incorporating these ingredients, you’re ensuring your pet gets a well-balanced treat that contributes to their overall health and happiness. Each bite is like a little burst of garden freshness!

The recipe is simple, making it an ideal project for new bakers or those looking for a quick treat to whip up. It starts with blending the vegetables to a fine consistency and then combining them with whole wheat flour, oats, and a touch of peanut butter for that extra nutty flavor. Don’t worry; the process is mess-free, and the ingredients come together beautifully with minimal effort. After shaping the dough into bone-shaped biscuits, you’ll pop them in the oven, and in no time, your home will be filled with a mouth-watering aroma that will have your dog’s attention in an instant.

These homemade biscuits are not just about the deliciousness; they’re also about ensuring your dog’s treats are free from artificial ingredients. Many store-bought options are loaded with preservatives and additives, which can be a cause for concern for health-conscious pet owners. By baking your own, you’re in control, ensuring that each ingredient is healthy, fresh, and beneficial to your pet’s diet. It’s a win-win situation—a tasty treat without the worry.

In addition to being a healthier option, these veggie-packed biscuits offer a fun way to introduce more vegetables into your dog’s diet. If you’ve been struggling to get your pet to eat their greens, this recipe could be the secret weapon you’ve been searching for. The biscuits’ savory taste and texture will have your dog eagerly awaiting their next snack, and you’ll love the peace of mind that comes with knowing you’re providing them with the best.

The benefits of these homemade dog treats extend beyond just the ingredients. Baking them is a great bonding activity for the whole family. Kids can get involved, learning about the importance of healthy eating for pets while having fun in the kitchen. It also fosters a sense of responsibility and creativity as they help craft a special treat for their furry sibling.

So, roll up your sleeves and get ready to bake! These veggie-packed savory dog biscuits are not only a recipe for healthier, happier pets but also an opportunity to create lasting memories in the kitchen. Your dog will thank you with every enthusiastic crunch, and you’ll feel the joy that comes from providing them with a treat that’s truly made with love.

No-Bake Coconut and Honey Dog Balls

Making your furry friend some homemade treats can be a fun and healthy way to show your love, and these No-Bake Coconut and Honey Dog Balls are the perfect recipe to try! Easy to prepare and packed with wholesome ingredients, these tasty treats will have your dog wagging their tail with delight.

This no-bake recipe is quick and straightforward, making it ideal for those busy pet parents who still want to provide their pups with delicious, homemade goodies. All you need are a few simple ingredients that you might already have in your pantry! The main stars are coconut and honey, both known for their sweet and nourishing qualities. Coconut provides healthy fats, while honey adds a natural sweetness that dogs love, and it’s a great alternative to processed sugars.
>Ingredients:
– 2 cups of shredded coconut, either sweetened or unsweetened based on your preference.
– 3/4 cup of creamy peanut butter, a tasty protein-packed addition. (Ensure it’s xylitol-free as xylitol is toxic to dogs.)
– 1/4 cup of honey, a natural sweetener with added health benefits.
– 1/2 cup of milk, cow’s or plant-based, to help bind the mixture.
– 1/2 cup of whole oats, for added fiber and texture.

Preparation:
1. In a medium-sized bowl, mix the shredded coconut, peanut butter, and honey until well combined. You can use a spoon, but mixing with your hands gets a little messy and is a whole lot of fun!
2. Slowly add the milk, stirring continuously until you have a sticky mixture that holds together well.
3. Take a small amount of the mixture and roll it into balls, approximately 1-inch in diameter. A great task for little helpers if you have any around!
4. Roll each ball in the oats to coat them. This gives the treats a lovely texture and appearance.

These treats don’t require any baking, making them super convenient. Place the balls on a tray or plate and refrigerate for at least 2 hours to firm up. Once ready, pop them into an airtight container and store them in the fridge to maintain their freshness for up to 2 weeks.

What’s more, these treats aren’t just delicious, but they’re also a healthier alternative to many store-bought options. Coconut and honey are known to have antibacterial and immune-boosting properties, so you can feel good about giving them to your furry friend as a special reward.

Your dog will adore these No-Bake Coconut and Honey Dog Balls, and they’re so simple to make that you’ll be reaching for this recipe time and time again. They’re perfect for a quick reward during training sessions or as a special everyday treat. Enjoy the process, and watch your dog’s excitement as they anticipate these yummy snacks!

There you have it! An easy, no-bake treat that’s sure to become a favorite in your household. Happy treating!

High-Protein Turkey and Quinoa Training Treats

Are you ready to give your furry friend a tasty and nutritious treat that fuels their active lifestyle? Look no further than these high-protein turkey and quinoa training treats! As a pet owner, we know you want the best for your four-legged companion, especially when it comes to their training rewards. With a focus on health and taste, these homemade treats are a perfect way to show your love and keep your pet motivated during those training sessions.

These delicious bites are packed with high-quality protein sources, combining the goodness of lean ground turkey and quinoa, a superfood grain. Protein is essential for muscle growth and repair, making it the ultimate fuel for your pet’s energetic endeavors. But it’s not just about the protein. These treats also boast an array of vitamins, minerals, and healthy fats, ensuring your pet gets a well-rounded nutritional boost with every bite. Say goodbye to store-bought treats that fall short on nutrition and hello to a homemade option that will have your pet wagging its tail with delight!

The beauty of these treats lies in their simplicity. Made with just a few ingredients, you can trust that you’re feeding your pet the best. Lean ground turkey, cooked to perfection, provides a savory flavor and ample protein. Quinoa, a nutritional powerhouse, adds texture and even more protein to each bite. A touch of sweet potato not only makes these treats irresistible but also contributes to their vibrant color and provides essential vitamins and fiber. And a sprinkle of cinnamon adds a unique flavor twist while offering potential health benefits.

Preparation is a breeze! Simply cook the quinoa and sweet potato, mix in the ground turkey and cinnamon, and bake until they’re perfectly crispy. The result? A batch of delectable, golden-brown treats your pet will go head over paws for. The aroma of these treats fresh out of the oven will have your pet by your side in no time, eager to try their new favorite snack.

But the benefits don’t stop at great taste and nutrition. These treats are also a fantastic way to support local farmers and reduce your environmental footprint. By sourcing the ingredients from local farms, you’re reducing transportation-related emissions and supporting sustainable agriculture. It’s a win-win for your pet, your community, and the planet.

In a world filled with mass-produced pet treats, these homemade goodies stand out. They provide a personalized, healthy alternative that lets you control the ingredients and cater to your pet’s specific needs. So, roll up your sleeves, gather the simple ingredients, and get ready to create a treat that will have your furry friend eager to learn new tricks.

Training treats shouldn’t be an afterthought but a carefully chosen tool in your pet’s wellness journey. With these high-protein turkey and quinoa bites, you’re not just rewarding your pet; you’re investing in their health and happiness. Treat time just became the highlight of your pet’s day, and prep time becomes yours, as you craft these simple yet delectable snacks. Happy baking, and happy training!

Preparing pet treats at home is an excellent way to show your love and ensure your pet gets the best nutrition. Get creative with ingredients, and remember, your pet’s health starts with what they eat. Happy baking, and paws up for healthy treats!

*Disclaimer: Always consult your veterinarian regarding any dietary changes or concerns for your pet’s specific nutritional needs.*

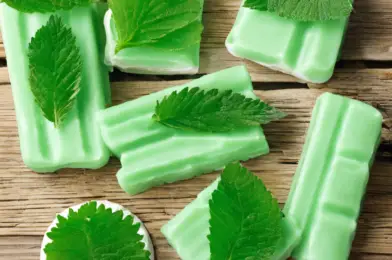
DIY Dental Chews: Minty Fresh Breath Treats

# DIY Dental Chews: Treat Your Pet to Minty Fresh Breath

We all know the struggle of dealing with our furry friends’ not-so-fresh breath. As a pet owner, you may have tried various treats and chew toys, but have you considered making your own dental chews to combat that stinky doggy or kitty breath? It’s a fun project that can save you money and provide a healthy, tasty treat for your pet. Say goodbye to bad breath and hello to a happy, healthy smile!

## Benefits of DIY Dental Chews

Taking care of your pet’s dental hygiene is essential for their overall health. Poor oral hygiene can lead to various problems, such as gum disease, tooth decay, and even more severe health issues. Commercial dental treats are often expensive and may contain less-than-ideal ingredients. By making your own dental chews, you can ensure your pet gets a natural and safe treat while saving a trip to the pet store.

DIY dental chews allow you to control the ingredients, ensuring they are healthy, natural, and free from artificial additives. Plus, the process is incredibly simple and can be a fun activity for pet owners. All you need are a few basic ingredients and some creativity!

## Ingredients You’ll Need

– 1 cup of mint leaves (freshly chopped)
– 1/2 cup of parsley (finely chopped)
– 1/4 cup of coconut oil (melted)
– 2 tablespoons of dried, ground pumpkin seeds
– 1/2 cup of oat flour
– 1/4 cup of water
– A pinch of salt (optional)

## Instructions:

Step 1: Preheat your oven to 350°F (180°C).

Step 2: In a medium-sized bowl, mix the chopped mint leaves, parsley, coconut oil, ground pumpkin seeds, oat flour, and salt (if using). Combine until you get a thick, sticky dough. Add water gradually to achieve the desired consistency.

Step 3: On a parchment-lined baking sheet, roll out the dough to about 1/4 inch thickness. Cut the dough into small, bite-sized treats using fun-shaped cookie cutters or a knife.

Step 4: Bake the treats in the oven for approximately 25-30 minutes or until they are golden brown and slightly crispy.

Step 5: Let the treats cool down completely before treating your pet to a minty fresh snack!

## Tips and Tricks:

– Feel free to adjust the mint and parsley quantities to suit your pet’s taste preferences. Some pets love a strong minty flavor, while others may prefer a milder version.
– If your pet is not a fan of mint, you can substitute it with other pet-safe herbs like basil or cilantro.
– Store the treats in an airtight container in the fridge for up to two weeks or freeze them for longer shelf life.

These DIY dental chews are a great way to bond with your pet through cooking and provide them with a healthy, tasty treat. Not only will they enjoy the flavor, but you’ll also notice a significant improvement in their breath. Say goodbye to unpleasant pet breath and hello to more cuddles and kisses!

Banana and Oat Dog Treats for Sensitive Stomachs

If your furry friend has a sensitive stomach, you know the struggle of finding suitable treats that won’t cause digestive upsets. Many store-bought options can be packed with additives and artificial ingredients, making them unsuitable for sensitive tummies. But worry not! These homemade Banana and Oat Dog Treats are here to save the day and your pup’s tummy troubles. Easy to make and packed with wholesome ingredients, they are a perfect solution for dogs with delicate digestive systems.

Oats are a fantastic ingredient for sensitive dogs as they are gentle on the stomach and provide a good source of soluble fiber, which can help regulate digestion. Bananas, a favorite for their potassium and vitamin C content, add a natural sweetness that dogs love, and they also contribute to a healthy gut by promoting ‘good’ bacteria in the digestive tract. Together, these ingredients create a simple, affordable, and healthy treat that your four-legged friend will adore.
.
To make these delicious and tummy-friendly treats, start by gathering your ingredients: 2 ripe bananas, 1.5 cups of quick-cooking oats, and a spoonful of peanut butter (optional). The peanut butter adds protein and healthy fats, but if your dog has a peanut allergy, you can simply omit it. Preheat your oven to 350°F (180°C) and line a baking sheet with parchment paper for easy cleanup.

In a medium-sized bowl, mash the bananas with a fork until smooth. Mix in the oats and peanut butter (if using), ensuring everything is well combined. The dough should be stiff but sticky. If it’s too dry, add a bit more mashed banana, and if it’s too wet, sprinkle in a little more oats. The consistency should be such that you can easily form it into small, bite-sized treats.

Using a teaspoon, drop the dough onto the prepared baking sheet, leaving some space between each treat to allow for spreading. You can also roll the dough into small balls if you prefer a more uniform shape. These treats won’t spread or rise much, so you can place them quite close together.

Bake the treats for approximately 15-20 minutes or until they are slightly golden and firm to the touch. Remember, they will harden a little as they cool, so don’t over-bake them. Baking time can vary depending on the exact size and your oven, so keep an eye on them to ensure they don’t burn.

Let the treats cool completely before treating your dog. They will keep in an airtight container in the fridge for about a week, or you can freeze them for longer-term storage. Your pup will go bananas for these healthy, homemade goodies, and their sensitive stomach will thank you!

Making your own dog treats not only ensures you know exactly what your pet is eating but also allows you to cater to their individual needs. With these Banana and Oat Treats, you can reward your pup without the worry of exacerbating digestive issues. So, get baking and watch your furry friend wag their tail with delight over these special, tummy-friendly treats.

Do you have a dog with a sensitive stomach? What are some of your go-to recipes? Share your experiences in the comments below! We’d love to hear about your pup’s favorite treats and any additional tips for keeping their tummies happy. Happy baking, and here’s to many tail wags and happy bellies!

Pumpkin Spice Dog Cookies: A Fall Favorite

The crisp autumn air brings a bounty of seasonal delights, and for dog owners, there’s a special treat that perfectly captures the essence of fall – Pumpkin Spice Dog Cookies. These delightful goodies are not just a tasty indulgence for our furry friends but a fun way to celebrate the season. As leaves change colors and the air turns crisp, it’s time to stock up on these seasonal cookies that are sure-fire hits with your four-legged companions.

Baking enthusiasts often find themselves in the kitchen, whisking up delicious treats during the fall season, and what better way to include your pets in the festivities than by baking these aromatic dog cookies? The aroma of cinnamon, nutmeg, and ginger wafting from the oven will tantalize both human and canine noses alike. These cookies are not just a treat for the taste buds but also a wholesome addition to your pet’s diet, offering a natural source of fiber and vitamins.
‘Pumpkin Spice’ isn’t just a flavor reserved for lattes; it’s a delightful ingredient in dog treats, too! The warm spices in these cookies create a cozy ambiance and a flavor profile that dogs adore. Pumpkin, a common ingredient in pet treats, provides numerous health benefits, serving as an excellent dietary supplement for dogs, especially those with sensitive stomachs.

Creating these cookies is a fun, family-friendly activity. With a simple recipe, you can involve the kids, ensuring a memorable baking experience and a healthier alternative to store-bought treats. Homemade dog cookies are a wonderful way to show your pets some extra love, and the pumpkin spice variety is a perfect autumnal choice. The process of mixing, rolling, and cutting the dough into fun shapes is a delightful family activity, made even more special when the cookies are safe for sampling by every member of the family.

When it’s time to unwind after a brisk fall walk, pamper your pup with a homemade cookie. These treats can be a reward for good behavior, a training incentive, or simply a daily indulgence. The natural sweetness from the pumpkin and spices makes these cookies a healthier option than many commercially available treats, ensuring you’re not only spoiling your dog but also supporting their health.

For those who love spoiling their dogs and embracing seasonal trends, baking Pumpkin Spice Dog Cookies is a must-try activity. It’s a creative way to engage your family in the kitchen while showing your pets some love and care. These cookies are a testament to the joy of homemade treats, offering health benefits and a shared bonding experience. So, this fall, gather your ingredients, preheat your oven, and create a batch of these delightful cookies, ready to be shared and savored by your beloved pets.

The recipe for these cookies is straightforward and customizable. Start with pureed pumpkin, a staple in autumn baking, mixed with whole wheat flour and a pinch of cinnamon, nutmeg, and ginger. You can adjust the spices to cater to your dog’s taste preferences. Roll out the dough, cut out fun autumn-themed shapes, and bake until golden. The result? Delicious, aromatic cookies your dog will adore, and you’ll love treating them to.

In a season filled with smells, colors, and tastes that dogs love, these cookies are a natural fit. They’re a perfect way to enjoy the fall festivities, making your home smell delicious and your dog’s tail wag with happiness. The cookies can even be packaged as gifts for fellow dog lovers, offering a unique, personal touch to your fall celebrations and a special treat for their furry friends.

It’s time to embrace the season and treat your dog to the flavors of fall. Pumpkin Spice Dog Cookies are more than just a tasty snack; they’re a tradition, a healthy treat, and a fun family project. As you bake and share these cookies, you’re creating memories, indulging in seasonal traditions, and offering your dog a taste of the season’s delights. This fall, let the aroma of pumpkin spice fill your home and bring joy to your canine companion.

Homemade Chicken and Apple Dog Treats

Treat your furry friends to a delicious and healthy snack with these homemade chicken and apple dog treats! This recipe is a fun and nutritious way to show your pups some love and pamper them with a homemade treat that’s better than anything you could buy at the store. And the best part? It’s super easy to make!

These treats are packed with lean protein from the chicken and natural sweetness from the apples, providing a nutritious and tasty snack for your four-legged companions. Apples are a great source of vitamins, fiber, and antioxidants, which can contribute to your dog’s overall health and well-being. Plus, the natural sweetness of apples can be a welcome alternative to the artificial flavors and sweeteners found in many store-bought treats.
.
Here’s what you’ll need to get started:

**Ingredients:**
– 2 cups of whole wheat flour (or your preferred dog-safe flour)
– 1/2 cup of quick oats
– 1/2 cup of unsweetened applesauce
– 1/2 cup of shredded, cooked chicken
– 1 medium apple, cored and finely chopped
– 2 tablespoons of coconut oil (melted)
– 1/4 cup of water

**Optional:**
– Some cinnamon for an extra aromatic treat
– A dash of honey for added sweetness

**Instructions:**

1. Preheat your oven to 350°F (180°C). Line a large baking sheet with parchment paper or a silicone baking mat.

2. In a large bowl, combine the flour, oats, applesauce, shredded chicken, and chopped apple. Mix until well incorporated. Add the optional cinnamon and honey if desired, but remember that dogs have sensitive taste buds, so a little goes a long way!

3. Slowly add the melted coconut oil and water to the mixture, stirring until a thick dough forms. You may need to adjust the water quantity depending on the moisture content of the other ingredients. Aim for a dough that is soft but not sticky.

4. On a floured surface, knead the dough for a minute or two, then roll it out to about 1/4-inch thickness. Use cookie cutters to create fun shapes or simply cut the dough into bite-sized pieces.

5. Place the treats on the prepared baking sheet, leaving a little space between each one.

6. Bake for approximately 15-20 minutes or until the edges are golden brown. Baking time may vary depending on the size and thickness of your treats.

7. Let the treats cool completely before serving to your furry friends. They will love the crunchy texture and the delicious combination of chicken and apple!

These homemade treats are a healthier alternative to store-bought options, and you can control the ingredients to ensure they are safe for your pets. Plus, you can customize the recipe to suit your dog’s preferences or dietary needs. Feel free to get creative and experiment with different additions, like adding peanut butter or carrots, but always consult your vet if you have any concerns about specific ingredients.

Make a batch of these treats for your dog, and you’ll have a happy pup and some great-smelling treats in no time! Homemade treats are a fun way to show your love and care for your furry family members, and they’ll be eager to give you a paw-shake for more! Enjoy the baking and the happy, healthy pups!

Grain-Free Sweet Potato Chews for Dogs

Are you tired of store-bought dog treats filled with unknown ingredients? It’s time to pamper your furry friend with a homemade, healthy, and delicious snack! These grain-free sweet potato chews are not only a tasty treat but also packed with essential nutrients that your dog will love. Say goodbye to artificial additives and hello to a wholesome snack that will have your pup wagging its tail in no time!

Sweet potatoes are an excellent source of dietary fiber, vitamins A and C, and minerals like manganese and potassium. They offer a natural, easily digestible energy source for your dog’s active lifestyle. These orange powerhouses are also rich in beta-carotene, promoting healthy skin and a shiny coat. Plus, their slightly chewy texture helps keep your dog’s teeth clean and breath fresh!

Here’s the best part: making these chews is a breeze! Preheat your oven to 350°F and grab a couple of sweet potatoes. Thoroughly wash and peel them, then cut into thin slices (about 1/8 inch thick). Lay the slices on a baking sheet lined with parchment paper. For some extra flavor, you can lightly coat the slices with coconut or olive oil and sprinkle a pinch of cinnamon. Pop them into the oven for approximately 20-25 minutes, and voila! Custom-made treats are ready for your pup’s approval.

If you’re feeling creative, you can experiment with different shapes and sizes. Try cutting the sweet potatoes into bite-sized cubes or fun bone shapes to keep things exciting. Just remember to adjust the baking time accordingly to ensure they’re cooked through but not burnt. Your dog will appreciate the variety, and you’ll appreciate the ease and affordability of these homemade treats.

These chews are not only tasty but also support your dog’s overall health and well-being. By making your dog treats, you can ensure they’re free from preservatives, artificial colors, and other questionable ingredients often found in store-bought options. It’s a win-win situation!

The benefits of homemade treats don’t stop there. You’ll also be able to control portion sizes, ensuring your furry friend doesn’t indulge in too many treats, and you can easily accommodate any dietary restrictions or allergies your pet may have. It’s a simple way to show your dog some extra love without compromising their health.

So, the next time you’re at the store, pick up some sweet potatoes and get baking! Your dog will be delighted with the results, and you’ll feel good knowing exactly what goes into their treats. Homemade goodies are a great way to bond with your pet and provide them with something truly special.

Don’t be surprised if your dog starts begging for more of these delicious chews. You might find yourself making a double batch to keep up with the demand! Happy baking, and happy snacking to your furry friend!

Making homemade treats is a fantastic way to show your pet some extra love without the worry of unknown ingredients. With just a few simple steps, you can create a wholesome and tasty reward for your furry companion. There’s something incredibly satisfying about seeing your dog’s excitement over a treat you made yourself.

Have you tried making your own dog treats before? What recipes have been a hit with your four-legged friend? Let us know in the comments!

Frozen Yogurt Pupsicles: A Cool Summer Treat

Summer is here, and what better way to beat the heat than with a refreshing treat that both you and your furry friend can enjoy? Introducing Frozen Yogurt Pupsicles – a healthy and delicious dog-friendly dessert that will have your pup’s tail wagging with happiness!

As a dog owner, you know the struggle of finding the perfect summer snack. You want to ensure your furry companion stays cool, but you also want to avoid unhealthy treats that could harm their wellbeing. Well, say goodbye to those worries with this simple and fun recipe that will have your dog begging for more. These pupsicles are not only a tasty delight but also a great way to bond with your canine companion during the hot summer months.

The star ingredient in this recipe is, of course, yogurt. Yogurt is an excellent source of calcium and protein, which are essential for your dog’s bone health and muscle development. It also contains probiotics that aid in digestion, ensuring your pup’s tummy stays happy and healthy. Opt for plain, unsweetened yogurt to avoid any unnecessary sugar, and always check for potential allergens like artificial sweeteners that may be harmful to your pet.

Creating these pupsicles is a breeze, and your dog will be delighted to help you in the kitchen! Simply mix the yogurt with some water to achieve a pourable consistency, and then pour the mixture into a silicone mold or ice cube tray. You can even add a few pieces of your dog’s favorite treat or some fruit for an extra special surprise. Freeze the mixture, and voila! You have a pawsitively perfect summer snack ready to go.

These Frozen Yogurt Pupsicles are not just a tasty treat; they also provide a fun way to cool your dog down on those scorching days. Instead of letting your pup gulp down water quickly, these pupsicles encourage them to enjoy a slower, more interactive way of hydrating. Plus, watching your dog enjoy a frozen treat will undoubtedly bring a smile to your face.

This recipe is versatile, too. Feel free to experiment with different types of yogurt or add a variety of dog-safe fruits like blueberries or bananas. You can even create themed treats for holidays or special occasions, making each pupsicle a unique and memorable experience for your furry friend. Who knew keeping your dog cool and healthy could be so much fun?

So, get creative in the kitchen and whip up a batch of Frozen Yogurt Pupsicles! Your dog will thank you with lots of licks and tail wags, and you’ll feel good knowing you’re providing them with a healthy, homemade treat. It’s a win-win for both you and your furry companion. Enjoy the summer together and stay cool with these paw-some treats!

Remember, making treats at home allows you to control the ingredients, ensuring your dog gets only the best. Store-bought treats often contain preservatives and additives that might not be beneficial for your pet. With Frozen Yogurt Pupsicles, you can trust that your furry friend is getting a wholesome, delicious, and safe summer snack.

The best part about these pupsicles is that they are incredibly easy to make and involve minimal cleanup. No baking or complicated steps required! Just mix, freeze, and serve. Your dog will surely be your taste-testing assistant throughout the process, eagerly awaiting the final product. It’s a fun activity that will leave your pup’s taste buds satisfied and their heart content.

As you enjoy these special treats, don’t forget to share the love and capture those adorable moments. Post pictures of your pup enjoying their Frozen Yogurt Pupsicles on social media, and spread the joy of this delicious, dog-friendly dessert to other pet owners. Happy pupsicle-making and stay cool this summer!